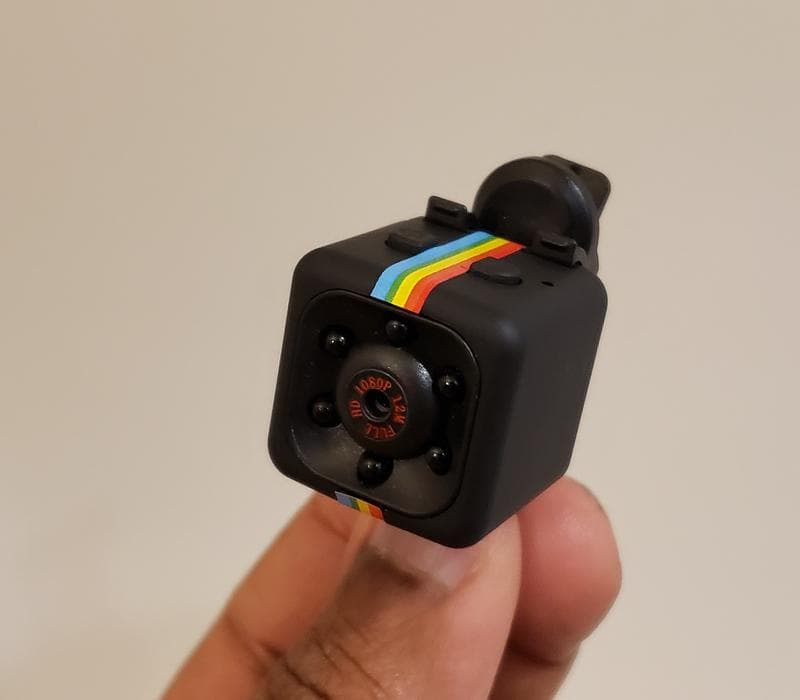
The SQ11 Mini DV Camera is a small yet powerful device with many applications. This camera is currently being sold by a number of resellers and is often marketed as an alternative sport camera; however, its small form factor is great for many security applications as it can be mounted and hidden almost anywhere. The small design also forces you to have keen knowledge of its operations before using it, as its many functions are accessed via only two buttons! Because of this, we thought it would be helpful to overview the setup and functions of this awesome little camera. Let’s dive in.
How to Setup the SQ11 Mini DV Camera
First, you will need a spare microSD card to store photos and videos locally on the device. We suggest going with a 32 GB card to maximize storage. Insert it into the flash card slot.
Next, fresh out of its packaging, the SQ11 Mini will need its built-in lithium-ion battery to be fully charged before operation. Use the supplied USB cable to plug the camera into your computer to begin charging. You should see the LED indicator on the side of the camera flash red. It will show a solid red light to let you know when it is fully charged.
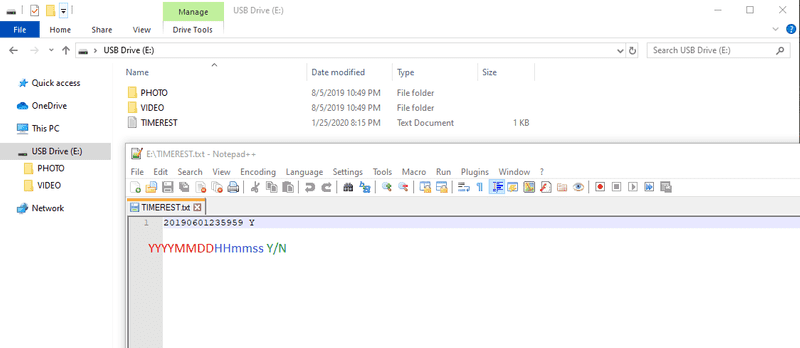
While we are plugged into your computer, now is a perfect time to checkout the file structure that was automatically setup on the inserted flash card. Navigate to the camera’s USB drive and you should see that along with a PHOTO and VIDEO folder, the mini cam has created a file named: TIMEREST.
Open this file with a text editor to see a single line of text. This is where the clock is set for the time stamps displayed on videos. You can change the date and time to match that of your local timezone or change the “Y” to “N” to turn off time stamps all together. Save your changes, unplug the camera, and turn it on.
How to Use the Mini Camera
The SQ11 has three main modes that can be accessed using the mode button. Once the camera has been powered on, the LED indicator will give a solid blue light to show that it is on standby to record video in 720p.
Standby Modes
- (solid blue) 720p
- (solid blue and red) 1080p
- (solid red) Photo
Pressing the MODE button at this point will toggle through the three camera modes in standby. The LED indicator can be read to tell which mode you are in. Solid blue as stated before is 720p video. Press the MODE button once, and you will see solid red and blue lights. You will now be in 1080p standby. Pressing the MODE button a second time, you will see a solid red light. You are now in photo standby mode.
Recording Video and Taking Photos
While in either 720p or 1080p video modes, pressing the POWER button once will cause the LED to flash a few times before going out, and the video recording will start. The camera automatically saves videos every 5 minutes if left alone in this state. Pressing the POWER button again will stop recording and save the current video. You will return to video standby mode.
When in photo standby mode, the POWER button is also used to take photos. The LED will flash once to indicate that the picture has been taken.
You can check out this quick video displaying the different modes if any of this is confusing:
Motion Detection
This mini video cam comes equipped with motion detection recording capabilities. To turn this on, navigate to either 720p or 1080p video standby modes, then hold the MODE button for 3 seconds. The camera will enter a motion activated recording mode. It will record for a 1 minute interval once motion is sensed.
Night Vision
Night vision assisting lights can be toggled on and off at any time by holding the POWER button down for 2 seconds. The LED indicator will flash red 2 times to show that the IR night lights have been turned on and will flash 3 times to indicate that they have been turned off.
However, the power of these night vision LEDs is poor. They don’t provide much illumination under dark conditions unless your subject is up close to the lense - no more than a foot or two. Don’t expect much here.
Webcam
The SQ11 can be used as a webcam while hooked up to a computer via the provided USB cable. Once plugged in, press the power button once, and it will switch from charging to webcam mode. It will shoot video and take photos in 720p when used this way.
SQ11 Review and Applications
This is not the best mini cam on the market, but it is a great deal at its price point.
This little camera packs a lot of utility into a pretty small package making it useful in a number of situations. Its video quality is decent at 1080p. It has motion sensing, which is pretty responsive. It’s small, discreet, and lightweight. The microphone is surprisingly sensitive and picks up great audio - especially conversations in a room.
However, it does have a couple of flaws. First, the night vision is practically useless. Unless you are looking to capture something that is within a couple feet of the mini cam, you won’t be seeing much of anything in the dark. The other thing is the very short battery life. At 1080p you are only looking at about 1 - 2 hours worth of charge for shooting videos. This limits its applications.
So what are its best applications?
It can be used rather effectively as an impromptu nanny cam to watch your kids or unsupervised house guests while you are out of the house for a couple of hours.
It is also pretty handy as a dash cam for short, day-time trips. For a quick and easy install, just use the clip it came packaged with to attach it to your sun visor, and you are good to go.
Since it is marketed as a sports camera, you might also consider using it as a semi-discreet body camera. Just clip it to a jacket pocket, purse, etc. and try not to draw too much attention to it.
With a little ingenuity, it can be cleverly setup for a number of uses, making it easy to recommend at such a low price.